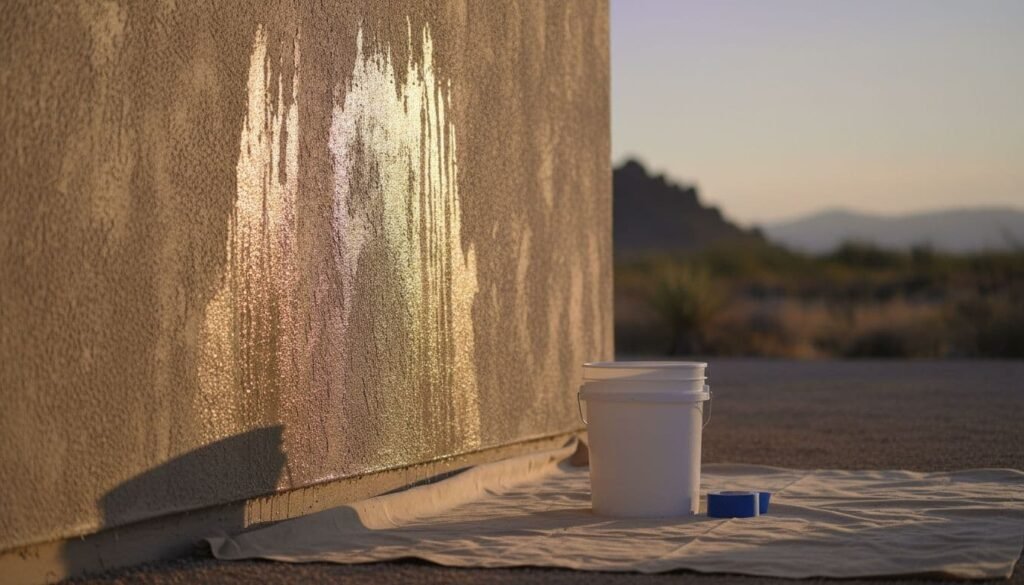
If you’ve lived through a few Palmdale afternoons, you know the wind doesn’t just mess up your hair. It drives dust into every texture on your exterior, and stucco has a lot of texture. Paint sticks best to a surface that’s clean, sound, and dry. That’s why washing matters.
The trick is cleaning well without scarring the stucco or pushing water where it doesn’t belong. Done right, you’ll set up your primer and topcoat to bond tight and last through high desert sun and temperature swings.
Why washing stucco matters more in the Antelope Valley
Stucco is porous. It holds fine dust, chalky residue from old paint, and salts that can mess with adhesion. In areas like West Palmdale, Rancho Vista, and up toward Quartz Hill, windblown grit is common, and it packs into the “peaks and valleys” of the finish.
When you paint over that dirt film, the coating bonds to the dirt, not the wall. A good wash removes:
- Dust and sand that act like a bond breaker
- Chalk from weathered paint that can cause early peeling
- Cobwebs and grime around eaves and light fixtures
- Mildew on shaded north walls (less common here, but it shows up)
Power wash or soft wash for stucco?
Many homeowners say “power wash,” but what stucco usually needs is controlled pressure and smart chemistry. You can pressure wash stucco safely, but high pressure is not the goal.
- Soft washing (low pressure + cleaner): Best for older, hairline-cracked stucco, patchy surfaces, or walls with mildew staining.
- Lower-pressure washing with a wide fan tip: Good for removing heavy dust and loose paint chips, as long as you keep pressure conservative.
If you want a deeper explainer on safe methods and what can go wrong, this guide lays out good guardrails: How to Safely Pressure Wash Stucco Without Causing Damage.
Materials and tools (keep it simple)
You don’t need a trailer rig, but you do need the right basics.
Tools
- Pressure washer with adjustable pressure (or a unit that accepts different tips)
- 40-degree and 25-degree fan tips (avoid 0-degree)
- Soap tip (low-pressure black tip) if using detergent through the machine
- Garden hose with spray nozzle
- Extension wand (optional, use carefully)
Protection and setup
- Safety glasses and closed-toe shoes
- Nitrile gloves if using cleaners
- Plastic sheeting and painter’s tape for masking
- Outlet covers or plastic bags for exterior receptacles
- Drop cloths for delicate plants
Cleaning
- Mild house wash or stucco-safe detergent
- Mildew remover if needed (follow label, protect plants)
Best time to wash in Palmdale (wind is the boss)
Plan around wind first, then temperature.
Smart scheduling for Palmdale and Lancaster
- Wash early morning when winds are calmer, and overspray is easier to control.
- Avoid windy afternoons. If gusts pick up, your spray pattern turns into mist, and that mist will drift onto windows, cars, and fresh landscaping.
- In January, allow extra dry time. Cool nights and morning dew slow evaporation, even in low humidity.
A simple rule: if it’s hard to keep plastic sheeting still, it’s too windy to wash.
Safe pressure and nozzle guidance for stucco (conservative ranges)
Stucco varies. Hard coat stucco can take more than EIFS, and older walls can be brittle. Start low and only increase if the wall stays intact.
| Stucco condition | Target PSI range | Nozzle tip | Working distance |
|---|---|---|---|
| Older, cracked, or patched | 600 to 1,000 PSI | 40-degree | 24 to 36 inches |
| Typical painted stucco | 800 to 1,200 PSI | 40-degree | 18 to 30 inches |
| Heavy dirt in texture (careful) | 1,200 to 1,500 PSI max | 25-degree | 18 to 24 inches |
Non-negotiables
- Don’t use a 0-degree tip on stucco.
- Don’t “dig in” to chase a stain. That’s how you get etching and visible stripes.
- Keep the wand moving. Think of it like spray painting, steady passes, no stopping in one spot.
Prep before you spray (this prevents most problems)
A pressure washer can turn small defects into big leaks. Prep is what keeps water out of the wall.
Do this first
- Patch obvious holes and let patches cure. Don’t wash fresh patch material.
- Scrape loose paint and chalky flakes by hand where needed.
- Seal or plan repairs for failed caulk at windows and trim (don’t rely on washing to “clean” bad joints).
Mask and protect
- Close windows and doors.
- Cover exterior outlets, doorbells, and camera wiring.
- Wet plants and soil before cleaning, then rinse again after.
Step-by-step: how to wash stucco without forcing water behind it
1) Pre-wet the wall
Lightly wet the stucco with a garden hose. This keeps detergent from soaking in too fast.
2) Apply cleaner (if needed)
For plain dust, water and gentle pressure may be enough. For grime, apply a mild wash from bottom to top to reduce streaking, then let it dwell per label.
Keep runoff controlled. Avoid spills of surface cleaners near plants.
3) Rinse from top to bottom using wide passes
This is the core of a safe approach to pressure washing stucco.
- Hold the nozzle at a slight downward angle.
- Use overlapping passes, like mowing a lawn.
- Keep distance consistent to avoid “tiger striping.”
4) Avoid these trap zones
These spots are where people push water into the wall cavity:
- Don’t spray upward into weep screeds at the base of stucco.
- Don’t spray upward into soffit vents or attic vents.
- Go easy around window sills, door trim, light fixtures, and hose bibs.
- Don’t blast directly into cracks. That drives water behind the finish.
If you want a good rundown of common technique mistakes that lead to damage, this is worth a quick read: Common Mistakes to Avoid When Pressure Washing.
5) Final rinse and wind management
In Palmdale, wind can throw mist back onto cleaned walls. If the breeze kicks up, stop and wait. A rushed rinse often leaves detergent residue, and residue can hurt paint bonding.
Dry time before painting (don’t guess)
Clean is only half the job. Dry is the other half.
Typical dry time for stucco after washing:
- 24 to 48 hours in warm, dry conditions with mild wind
- 48 to 72 hours in cooler January weather, shaded walls, or thicker textures
If you have a moisture meter, use it. Many coatings perform best when the substrate is dry and stable. If the wall feels cool and damp in the shade, wait another day. Paint over trapped moisture, and you can get blistering or peeling.
Estimated time ranges (realistic planning)
Most jobs take longer than people expect because masking and setup are slow.
- Small single-story home: 2 to 4 hours wash time, plus masking
- Two-story home with detail work: 4 to 8 hours
- Drying before paint: 1 to 3 days, depending on weather and shade
When it’s smarter to hire a pro
Hire a pro if any of these are true:
- The stucco has widespread cracks, failed caulk, or signs of water intrusion.
- You have a two-story layout with steep rooflines.
- You see heavy chalking and peeling paint, and aren’t sure what’s sound.
- You need to protect nearby cars, storefront glass, or sensitive landscaping.
- You don’t have a way to verify dry conditions before priming.
A pro should be willing to talk about PSI limits, tip choice, and drying time, not just “we’ll blast it clean.” Reach out to our team if you’d like a painting estimate for your stucco job.
Pre-paint readiness checklist for stucco (quick and practical)
Before you prime, walk the exterior and confirm:
- The surface looks clean with no dusty film when you rub it by hand.
- No soap residue remains in textured pockets.
- No loose paint edges lift when lightly scraped.
- Hairline cracks are addressed (or at least planned for repair).
- Caulk joints at windows and doors are sound, or scheduled for replacement.
- Stucco is dry, including shaded walls and areas under eaves.
- Windblown dust hasn’t re-coated the wall (a quick blow-off can help).
Tidy, Yet Thorough
A careful wash is one of the best ways to protect a paint job in Palmdale’s wind, sun, and dust. Keep pressure conservative, use wide fan tips, and never aim water upward into openings. Give stucco enough dry time, then prime and paint on a surface that’s ready to hold on tight. When the wall is clean, sound, and dry, your finish coat has a real chance to last